Proxmox VE上のVMでRTL-SDR受信環境を構築する
Guest OSはUbuntuで構築する。
VMの立ち上げ
RTL-SDR BLOG model
VM作成周りの手順は省略。
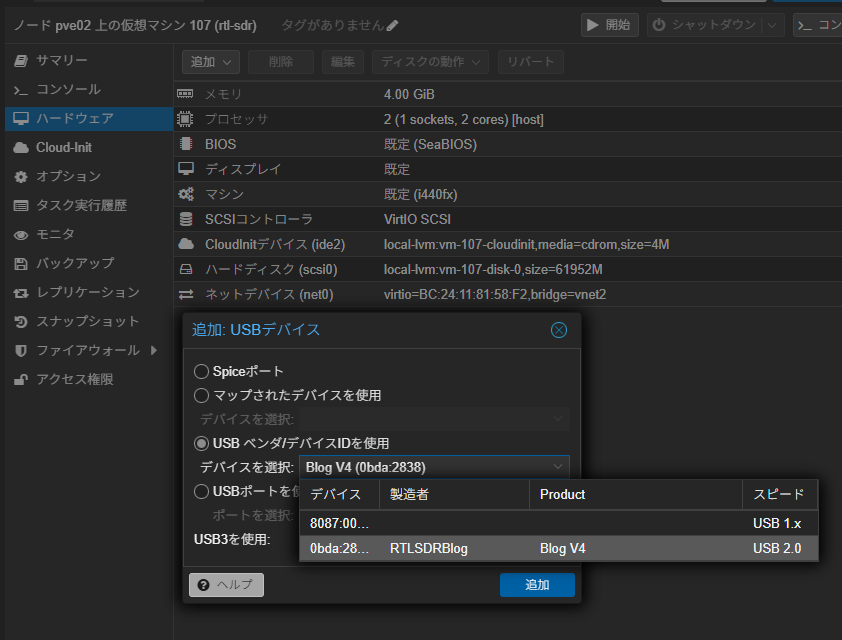
VMを作成したら起動する前にハードウェアからUSBデバイスを追加する。
下記画像のように、Blog V4が認識されていればOK。
ADS-B受信環境を整える
偉大なる先人様 org
https://github.com/sdr-enthusiasts/docker-install?tab=readme-ov-file
なおrootユーザーで実行しようとするとsuperuserで構築は推奨されない!といって怒ってくれるので、通常ユーザーでインストールする。
bash <(wget -q -O - https://raw.githubusercontent.com/sdr-enthusiasts/docker-install/main/docker-install.sh)インストールの途中で設問があるのでYを選択
Do you want to prepare the system for use with any of the RTL-SDR / ADS-B containers?Examples of these include the collection of containers maintained by SDR-Enthusiasts group:Ultrafeeder, Tar1090, Readsb-ProtoBuf, Acarshub, PlaneFence, PiAware, RadarVirtuel, FR24, other feeders, etc.It's safe to say YES to this question and continue unless you are using a DVB-T stick to watch digital television.
Please choose yes or no [Y/n] > yインストールが全部おわったら再起動。
ホストOS側でRTL SDRのkernel loadをブロックする
RTL-SDRがカーネルから読み込まれないようにする設定がdocker-installでVM内にインストールされているが、Proxmox VEホストOS上でも同じ設定を入れておき、不要なトラブルを避ける。
tee /etc/modprobe.d/blacklist-rtlsdr.conf <<TEXT1# Blacklist host from loading modules for RTL-SDRs to ensure they# are left available for the Docker guest.
blacklist dvb_coreblacklist dvb_usb_rtl2832ublacklist dvb_usb_rtl28xxublacklist dvb_usb_v2blacklist r820tblacklist rtl2830blacklist rtl2832blacklist rtl2832_sdrblacklist rtl2838blacklist rtl8192cublacklist rtl8xxxu
# This alone will not prevent a module being loaded if it is a# required or an optional dependency of another module. Some kernel# modules will attempt to load optional modules on demand, which we# mitigate here by causing /bin/false to be run instead of the module.## The next time the loading of the module is attempted, the /bin/false# will be executed instead. This will prevent the module from being# loaded on-demand. Source: https://access.redhat.com/solutions/41278
install dvb_core /bin/falseinstall dvb_usb_rtl2832u /bin/falseinstall dvb_usb_rtl28xxu /bin/falseinstall dvb_usb_v2 /bin/falseinstall r820t /bin/falseinstall rtl2830 /bin/falseinstall rtl2832 /bin/falseinstall rtl2832_sdr /bin/falseinstall rtl2838 /bin/falseinstall rtl8192cu /bin/falseinstall rtl8xxxu /bin/false
TEXT1modprobe -r rtl2832_sdrmodprobe -r dvb_usb_rtl2832umodprobe -r dvb_usb_rtl28xxumodprobe -r dvb_usb_v2modprobe -r r820tmodprobe -r rtl2830modprobe -r rtl2832modprobe -r rtl2838modprobe -r rtl8192cumodprobe -r rtl8xxxumodprobe -r dvb_coreRTL-SDR シリアルを設定する
RTL-SDRが認識されているかや、シリアルの確認、シリアルの変更を行えるようにするためパッケージインストールする
apt install rtl-sdrUSB認識されてるか確認
root@rtl-sdr:/opt/adsb# lsusb | grep RTLBus 002 Device 003: ID 0bda:2838 Realtek Semiconductor Corp. RTL2838 DVB-TRTL-SDRのシリアルを確認する
root@rtl-sdr:/opt/adsb# rtl_eepromFound 1 device(s): 0: Generic RTL2832U OEM
Using device 0: Generic RTL2832U OEMFound Rafael Micro R828D tunerRTL-SDR Blog V4 Detected
Current configuration:__________________________________________Vendor ID: 0x0bdaProduct ID: 0x2838Manufacturer: RTLSDRBlogProduct: Blog V4Serial number: 00000001Serial number enabled: yesIR endpoint enabled: yesRemote wakeup enabled: no__________________________________________シリアルを1090に設定する
root@rtl-sdr:/opt/adsb# rtl_eeprom -s 00001090Found 1 device(s): 0: Generic RTL2832U OEM
Using device 0: Generic RTL2832U OEMFound Rafael Micro R828D tunerRTL-SDR Blog V4 Detected
Current configuration:__________________________________________Vendor ID: 0x0bdaProduct ID: 0x2838Manufacturer: RTLSDRBlogProduct: Blog V4Serial number: 00000001Serial number enabled: yesIR endpoint enabled: yesRemote wakeup enabled: no__________________________________________
New configuration:__________________________________________Vendor ID: 0x0bdaProduct ID: 0x2838Manufacturer: RTLSDRBlogProduct: Blog V4Serial number: 00001090Serial number enabled: yesIR endpoint enabled: yesRemote wakeup enabled: no__________________________________________Write new configuration to device [y/n]? y
Configuration successfully written.Please replug the device for changes to take effect.root@rtl-sdr:/opt/adsb#設定書き込みが終わったらUSBを差し直しておく。
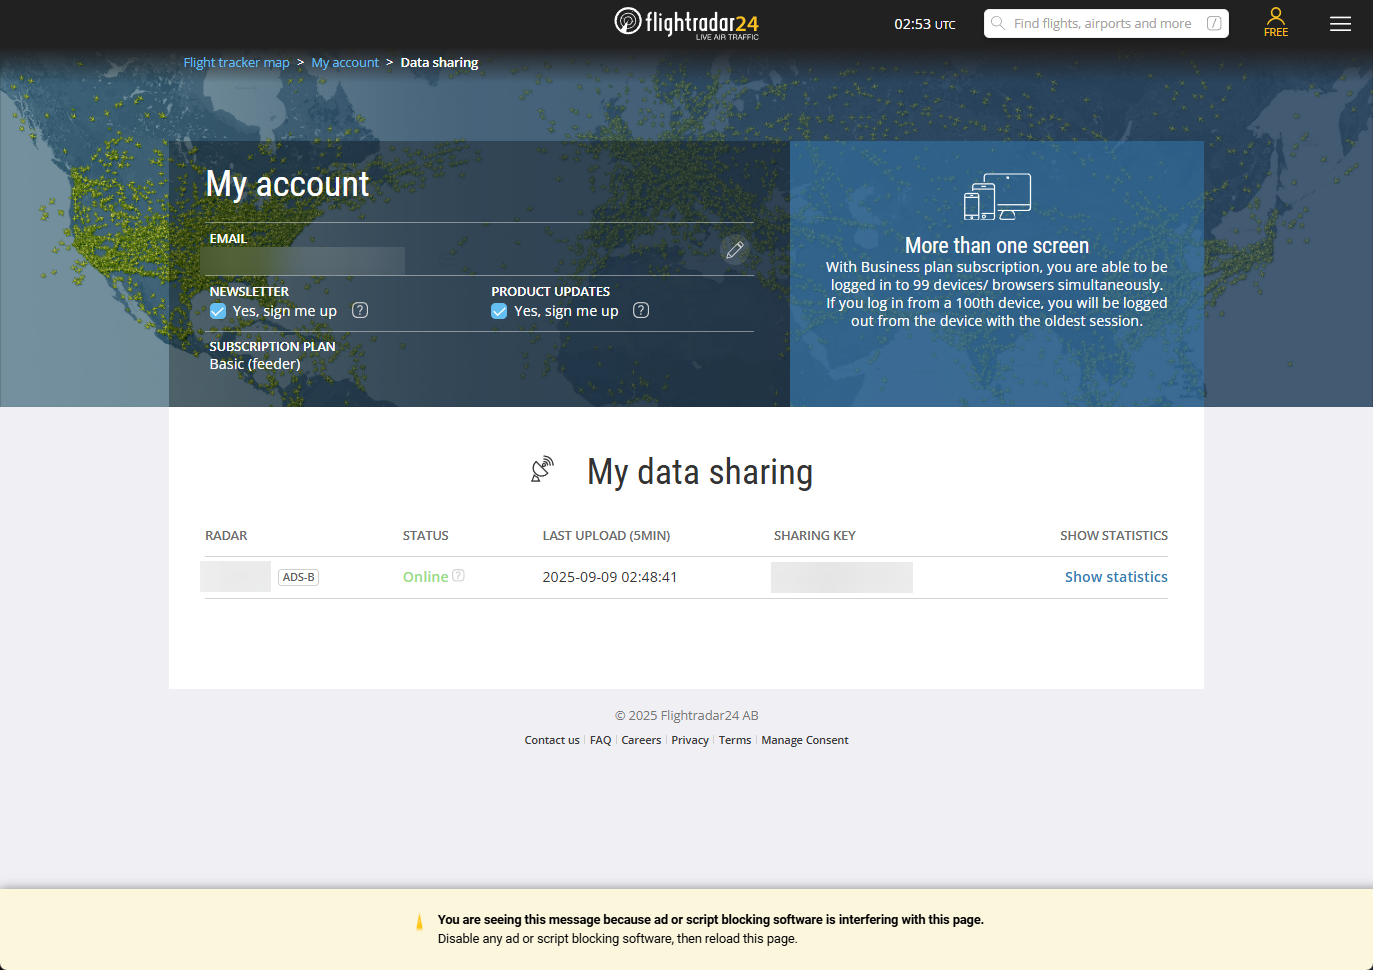
flightradar24 sharing keyを発行する
初めてfeedすることになるので、sharing keyを発行する。
docker run -it --rm ghcr.io/sdr-enthusiasts/docker-baseimage:qemu bash -c "$(curl -sSL https://raw.githubusercontent.com/sdr-enthusiasts/docker-flightradar24/main/get_adsb_key.sh)"Step 1.1 - Enter your email address (username@domain.tld)flightradar24アカウントのメールアドレスを入力Step 1.2 - If you used to feed FR24 with ADS-B data before, enter your sharing key.初めてなので空EnterStep 1.3 - Would you like to participate in MLAT calculations?noStep 3.A - Enter antenna's latitude (DD.DDDD)緯度を入力Step 3.B - Enter antenna's longitude (DDD.DDDD)経度を入力Step 3.C - Enter antenna's altitude above the sea level (in feet)標高をFeetで入力Would you like to continue using these settings?yesStep 4.1 - Receiver selection:4 - ModeS Beast (USB/Network)を選択Step 4.2 - Please select connection type:1 - Network connectionを選択Step 4.3A - Please enter your receiver's IP address/hostnamedocker composeで動かすコンテナにつなげるので、127.0.0.1を入力Step 4.3B - Please enter your receiver's data port number30005を入力
入力が完了すると、sharing keyとradar idが発行されるのでメモしておく。
Congratulations! You are now registered and ready to share ADS-B data with Flightradar24.+ Your sharing key (XXXXXXXXXXXXXX) has been configured and emailed to you for backup purposes.+ Your radar id is X-XXXXXXX, please include it in all email communication with us.+ Please make sure to start sharing data within one month from now as otherwise your ID/KEY will be deleted.ADS-Bを受信するDockerコンテナを作成する
これまたSDR Enthausiasts が用意してくれているdocker composeがあるのでこれを使う。
docker-compose.yaml
version: "2.0"
services: ultrafeeder: image: ghcr.io/sdr-enthusiasts/docker-adsb-ultrafeeder:latest container_name: ultrafeeder hostname: ultrafeeder restart: unless-stopped device_cgroup_rules: - "c 189:* rwm" volumes: - /dev/bus/usb:/dev/bus/usb:ro - ultrafeeder_globe_history:/var/globe_history - ultrafeeder_graphs1090:/var/lib/collectd - /proc/diskstats:/proc/diskstats:ro ports: - 8080:80 # Web interface environment: # 基本設定 - LOGLEVEL=error - TZ=${FEEDER_TZ}
# SDR設定 - READSB_DEVICE_TYPE=rtlsdr - READSB_GAIN=auto - READSB_RTLSDR_DEVICE=${ADSB_SDR_SERIAL} - READSB_RTLSDR_PPM=${ADSB_SDR_PPM}
# 位置情報 - READSB_LAT=${FEEDER_LAT} - READSB_LON=${FEEDER_LONG} - READSB_ALT=${FEEDER_ALT_M}m
# その他設定 - READSB_MODEAC=true - READSB_STATS_EVERY=3600 - READSB_STATS_RANGE=true
# Web interface設定 - TAR1090_FLIGHTAWARELINKS=true - TAR1090_SITESHOW=true - TAR1090_RANGE_OUTLINE_COLORED_BY_ALTITUDE=true - TAR1090_RANGE_OUTLINE_WIDTH=2.0 - TAR1090_RANGERINGSDISTANCES=50,100,150,200 - GRAPHS1090_DARKMODE=true tmpfs: - /run:exec,size=256M - /var/log
fr24: image: ghcr.io/sdr-enthusiasts/docker-flightradar24:latest container_name: fr24 restart: unless-stopped depends_on: - ultrafeeder ports: - 8754:8754 # FR24 web interface environment: - BEASTHOST=ultrafeeder - FR24KEY=${FR24_SHARING_KEY} - MLAT=yes - VERBOSE_LOGGING=false tmpfs: - /var/log dns_search: . # Dockerのバグによる接続問題を防ぐ
volumes: ultrafeeder_globe_history: ultrafeeder_graphs1090:.envを編集。
root@rtl-sdr:/opt/adsb# cat .env
FEEDER_TZ=Asia/Tokyo# https://maps.gsi.go.jp/# 国土地理院から緯度・経度・標高を取得し入力する# 緯度FEEDER_LAT=XX.XXXXX # あなたの緯度を入力# 経度FEEDER_LONG=XX.XXXXX # あなたの経度を入力# 標高FEEDER_ALT_M=0 # 標高(メートル)を入力
# RTL-SDR設定# docker-composeのenvにあるREADSB_RTLSDR_DEVICEをコメントアウトしておくとautodetectになる。複数台接続して運用する場合はSERIAL設定必須。ADSB_SDR_SERIAL=1090 # RTL-SDRのシリアル番号(上記で設定した数値)ADSB_SDR_PPM=0 # PPM補正値(通常は0)
# FlightRadar24設定(後で取得する)FR24_SHARING_KEY=<上記で発行したキーを入力>docker composeを起動してfeedできているか確認する
docker compose up -ddocker compose logs -f起動ログの中に、RTL-SDR Blog V4が確認できればOK
ultrafeeder | [2025-09-09 11:37:43.165][readsb] Found Rafael Micro R828D tunerultrafeeder | [2025-09-09 11:37:43.165][readsb] RTL-SDR Blog V4 Detectedhttp://
https://www.flightradar24.com/account/data-sharing にアクセスし、以下のようにレーダーが登録されていればOK。